Bread making is an art that involves several factors, one of which is the use of yeast as a leavening agent. Yeast is responsible for the fermentation process, which results in the rising and softening of the dough before baking. However, it is essential to test the yeast’s viability before incorporating it into your recipe, as inactive yeast can lead to a dense and unaerated final product. Learning how to test bread yeast is essential for baking bread and more!
There are different types of yeast available in the market, such as active dry, instant, and fresh yeast. Each type possesses unique properties that affect bread making. How to test bread yeast varies slightly depending on the type you are using, but the basic principle stays the same: ensuring that the yeast is alive and active.
Mastering the proper techniques to test the yeast, store it and use it in bread baking will significantly improve your baking results. From beginners to experienced bakers, it is crucial to understand the role of yeast and how to properly manage it in your kitchen for consistent and delicious results.
Key Takeaways
- Yeast is essential for fermentation and dough leavening in bread making
- Test the yeast’s viability to ensure a well-risen and soft final product
- Proper yeast storage and knowledge of its types improve overall baking success
Understanding Yeast and Its Types
Yeast is a living organism that plays a crucial role in baking, especially in bread making. It helps dough rise by converting sugar to carbon dioxide – this process is called fermentation. There are three main types of yeast commonly used in bread making: instant yeast, fresh yeast (cake yeast), and regular dry active yeast.
Instant yeast, also known as red star yeast or saf red yeast, is a granular yeast that dissolves quickly in liquids. It’s perfect for busy bakeries and home bakers since it doesn’t require proofing before adding to the dough. Instant yeast also has a longer shelf life compared to fresh yeast, which makes it a popular choice.
Fresh yeast, or cake yeast, is a moist, perishable yeast typically used by professional bakers. It has a short shelf life and needs to be stored in the refrigerator to keep its effectiveness. To use fresh yeast in a recipe, it must first be dissolved in water or milk with sugar before incorporating it into the dough. The high moisture content in fresh yeast helps produce better dough structure and a richer flavor. However, it’s not suitable for long fermentation processes as it’s less stable than other types.
Regular dry active yeast is another widely used type of yeast. Similar to instant yeast, it comes in granular form, but it requires proofing before mixing into the dough. To proof dry active yeast, it’s dissolved in a warm liquid (usually water or milk) with a pinch of sugar and left to sit for a few minutes until bubbles start forming. This ensures the yeast is active and ready for bread making.

It’s essential to understand which type of yeast is suitable for your bread recipe, as using the wrong kind can lead to less-than-ideal results. For instance, can pizza yeast be used for bread? It’s crucial to choose the right yeast based on your recipe’s requirements and intended flavor profile.
In summary, yeast is a vital component in bread making, and selecting the appropriate type is crucial for yielding the best taste and texture. Instant yeast, fresh yeast, and regular dry active yeast are three popular choices, each with its unique properties and usage guidelines. Make sure to consider the unique characteristics of each type when experimenting with bread recipes.
How to Test Bread Yeast
Testing bread yeast is a simple process that can save you from the disappointment of a dough that doesn’t rise. A simple test can help determine if your yeast is still active and good to use. To test yeast, you will need a small bowl, a teaspoon of sugar, a packet of dry yeast, and some water at room temperature.
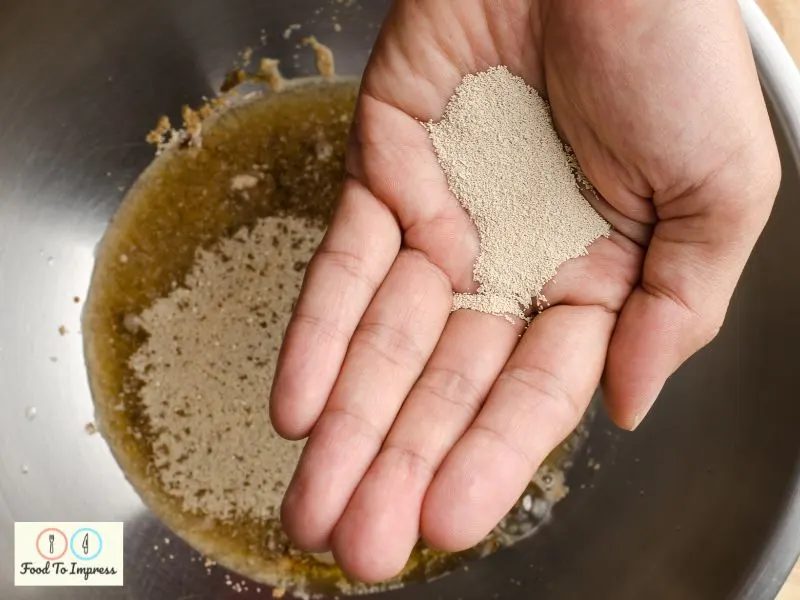
Start by pouring approximately 1/4 cup of water into the small bowl. The water temperature should be between 100°F to 110°F (37°C to 43°C) to ensure the yeast activates properly. Sprinkle a teaspoon of sugar into the water and mix it well so that it dissolves. Next, gently sprinkle the packet of dry yeast over the water and sugar mixture. Do not stir or mix the yeast; allow it to rest undisturbed for about 10 minutes.
During this time, an active packet of active dry yeast should start to form air bubbles in the mixture, and it should begin to foam. These signs indicate good yeast that should provide leavening and a proper rise to your dough. If, after 10 minutes, your yeast has not formed any bubbles or foam, this implies bad yeast, meaning it may be old or expired, and you should discard it and start with a new packet.
Keep in mind that air bubbles can also be affected by the humidity and temperature of your kitchen. It is crucial to find the right balance between water temperature, sugar to feed the yeast, and a comfortable room temperature to achieve optimal yeast performance.
A well-executed yeast test is an essential step to improving the quality and consistency of your homemade bread. Being aware of these simple steps and parameters should enhance your baking experience and avoid any common mistakes when your dough doesn’t rise, like those mentioned in Why Isn’t My Dough Rising? Avoid These 12 Common Mistakes.
Use of the Yeast in Bread Baking
When baking homemade bread, using yeast is a crucial step for achieving the desired texture and flavor. The type of yeast used and its qualities can greatly affect the outcome of a loaf of bread. Yeast breads are popular due to their light and airy texture, while denser breads often result from a lack of proper yeast activation. There are various types of yeast available, with each providing different rise times and characteristics to the finished product.
A popular addition to bread recipes is the yeast machine, which simplifies the bread-making process. By utilizing a yeast machine, bakers can ensure that their fresh bread will have an even rise and consistent texture, as the machine takes care of the dough mixing and kneading. In addition to providing a more controlled environment, yeast machines also allow for the incorporation of multiple yeast recipes, as the machine can adjust the rise time as needed for each specific yeast type.
Bakers should consider the following factors when incorporating yeast into their bread-making process:
- Yeast freshness: It is essential to use fresh and active yeast, as stale or expired yeast may not provide the proper rise, resulting in dense bread.
- Water temperature: Be cautious with water temperature, which should be warm but not too hot, as overly hot water can kill the yeast, reducing its effectiveness.
- Rise time: Different types of yeast will require varying rise times, so it’s important to adjust the rise time according to the yeast being used.
- Amount of yeast: Refrain from using excessive amounts of yeast, as this can lead to an overbearing yeasty flavor in the bread.
In summary, the use of yeast in bread baking is crucial in ensuring the desired outcomes of your homemade loaf. From selecting the appropriate type of yeast to adjusting the rise time accordingly, understanding and mastering the interaction between yeast and bread dough can greatly improve the quality and flavor of your fresh bread creations.
How to Store and Keep Yeast
Storing yeast correctly is essential to ensure its effectiveness in your baking endeavors. To prolong the yeast’s life and maintain its quality, follow these storage guidelines below.
First and foremost, always pay attention to the expiration date. Yeast loses potency over time, so it’s crucial to use it before the date mentioned on the packaging. If you’re unsure about the freshness of your yeast, you can perform a simple test by dissolving a teaspoon of sugar in a quarter cup of warm liquid (105°F to 110°F) and stirring in the yeast. Wait 10 minutes, and if the yeast mixture has expanded and has a foamy texture, it’s still active.
Storing yeast in an airtight container is the best way to protect it from moisture and oxygen. It’s a good idea to keep opened packages of yeast in a resealable plastic bag or a glass jar with an airtight seal. Unopened packages should be kept in their original containers to maintain freshness.
For a longer shelf life, placing yeast in the refrigerator or freezer is recommended. Freezing Yeast: Here’s Everything You Need To Know advises that freezing yeast can extend its life for several months beyond the expiration date. Make sure to let the yeast come to room temperature before using it to avoid affecting the consistency of your dough.
Store the airtight container or envelope of yeast in a dark place away from direct sunlight, heat, or humidity. Exposure to these elements can lower the yeast’s potency, which may negatively impact your bread’s taste and texture.
In summary, proper storage of bread yeast involves being mindful of the expiration date, using airtight containers, and placing them in cool, dark places. Following these guidelines will help you get the best results from your yeast, enhancing the quality of your homemade breads.