
It’s extremely disappointing when you go to pull your bread out the oven, only to be presented with something that’s clearly not what you wanted it to be.
A dense and heavy loaf of bread is certainly not the nicest thing to eat, so it can really drive you mad if it keeps happening.
The truth about baking bread is that it’s hard if you’re not experienced. There are so many things you need to learn before you fully understand how to bake just one perfect type of bread, so it’s important that you learn from your mistakes.
There are plenty of factors and mistakes that contribute to a disappointing loaf. A lack of gluten development, inactive yeast, improper shaping, and the overall time you give your bread to rise can all leave you with a dense, heavy, and even chewy end result.
Bread making seems fairly simple until it doesn’t work the way you want it to, so here are the reasons why your bread might not be turning out the way you want it to and what you can do next time.
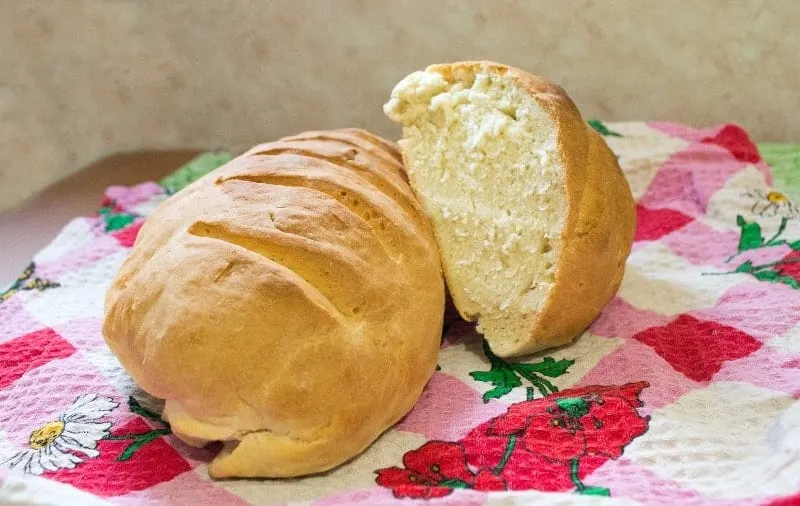
Why Is My Bread So Dense & Heavy?
One of the most common problems with an inexperienced baker’s bread is being too dense or heavy. It takes time to understand how bread works, so every new bread baker is expected to make a dense loaf at least once.
Two very important things for baking good bread with a more open crumb are gluten development and plenty of gas production from the yeast.
When yeast can feed on the sugars and starches in the flour, they give off carbon dioxide, which gets trapped by the network of gluten strands and results in a more open crumb.
Along with these two things, there are other factors that can contribute to how dense or light a loaf of bread is, so here they are.
These Can Affect How Dense Your Bread Is
Time
Without leaving enough time for your dough to prove, you’re not allowing the yeast to produce enough gas and rise your dough, so you won’t be left with the open texture that you expect to get in bread.
Don’t always follow the prooving timing in the recipe to a tee. The amount of time it takes for dough to prove completely depends on the type of yeast, the amount of yeast, the temperature of the dough, the amount of water, and the amount of salt you’ve added, so there are lots of things that you need to think about.
Your dough is completely prooved when it has risen until doubled in size, puffy, and aerated. To test if it’s ready, you should gently press your fingertip into it. If it has risen properly, it should not spring back completely.
Yeast Activity
If your yeast is dead, inactive, or has just drained its energy, your bread isn’t going to rise as you want it to.
You need to use yeast that’s active so you can make sure that it’s going to give you a good rise.
As long as you’re providing your yeast with an environment that’s full of sugars and starches (flour), with a means to move around (liquid), and at the right temperature, it should be able to rise appropriately.
You can help ‘wake up’ your yeast by sprinkling some sugar into your warm liquid and dissolving your yeast into it before mixing it into your flour.
It’s a good idea to make sure that your dough is at room temperature or slightly warmer. The rate at which your dough rises is increased by its temperature (until it gets too hot), so the warmer it is, the faster it rises. Don’t worry though, your dough should always rise as long as it’s not too cold.
Gluten Formation (Kneading)
Without gluten, you’re not going to get the airy and open crumb texture you associate with good bread.
Gluten is a protein that’s either developed in the kneading process or over a long time in high hydration doughs. The great thing about gluten is that it can trap the carbon dioxide produced by the yeast in pockets all around the dough, which leaves the bread with an airy structure once it’s baked.
If you’re not kneading your dough for long enough, you’re not going to be producing enough gluten, so your dough can’t hold much air and you won’t get the texture you want.
A lot of people like to give around 8-10 minutes to knead their dough, but I prefer to go by feel. I use two tests to know when my dough is fully kneaded. I use the poke test and the windowpane test.
The Poke Test:
This one is simple. All you need to do is form your dough into a ball and poke it with your fingertip.
The indentation should spring back immediately if your dough has been kneaded enough. If it doesn’t, continue kneading.
The Windowpane Test:
This is my personal favorite. Once your bread is kneaded enough, you should be able to stretch a portion of it so thin that you can see light through it.
Simply stretch out an end of the dough and pull it until it gets paper-thin. Put it up to some form of light and there should be a good amount of light passing through.
Continue kneading if your dough tears easily when you try and do this.
The Type Of Flour You Use
Since gluten is important, so is the flour.
Without a good protein content, you’re not going to get the gluten development you need.
Flours with a low protein content don’t have the same ability to create a good gluten network as bread flour, so they can result in a tight and dense crumb.
You need to be using a flour with a protein content of at least 10%, but ideally, around 11 – 13% as this has the best ability to create gluten whilst maintaining a nice texture.
If you want to use a low protein flour but still get a decent rise, make sure that you combine it with a bread flour so you can still get a good crumb.
Lack Of Water / Too Much Flour
If you’re lacking on the water or adding extra flour to your dough, you’re likely making it too dry. A dry dough means that the yeast can’t work its magic.
You want your dough to feel soft and slightly sticky after mixing. Don’t add more flour unless it’s absolutely necessary.
Many people add more flour to their dough for kneading or if they think it looks too wet, but it’s a huge mistake.
Once all your ingredients are mixed well, tip your dough out onto an unfloured surface and knead well until the dough pulls away from the surface without leaving any residue and passes the windowpane test.
After kneading for a while, you’ll notice that your dough is much less sticky, and easier to form.
With more experience, you’ll know when dough needs more flour or moisture and you can add some.
Shaping Of The Dough
The way you shape your dough plays a big part in how well it rises in the oven.
I remember making plenty of flat loaves before I realized that I needed to shape my dough in a certain way for it to rise in the oven.
All dough needs to be shaped in a different way according to it’s hydration level, shape, and size, but it’s important that you create some sort of surface tension and create a shape that will hold gas in the dough whilst it bakes.
With a lot of bread, you need to knock the gas out of the dough after its first prove and reshape it appropriately for its second prove before baking it.
Get the shaping technique right for the bread you’re making and your bread may end up being perfectly risen and light.
The Baking Time
If you’re not baking your bread for long enough, it may be coming out of the oven as a dense and heavy loaf rather than a light one.
Getting the baking time right can be difficult, especially if you’re baking a large amount of dough.
To check that it’s baked completely, you can test it in two ways. Either try the tap test or take its internal temperature. Pull your bread out of the oven and give it a few firm taps on the bottom. It should sound hollow and almost have an echo to it. Alternatively, you can prod it in the center with a thermometer until it reads 190 – 210°F (88 – 99°C) depending on the bread.
Everyone has a different oven and environment, so the time that you have to cook your bread is likely slightly different from that in the recipe. Make sure you understand your oven as it’s extremely important in baking anything.
The type of oven you use may be different too. Some people like baking in fan ovens whilst most bake in non-fan ovens. If you’re baking in a fan oven, just remember that everything bakes faster so you need to adjust the temperature and timing accordingly.
Temperature
The temperature a bread cooks at is different for many different types of bread. Some need extremely high temperatures to cook whilst others cook at a more comfortable temperature for longer.
The right temperature means that you’re at a good balance between cooking the bread through without overdoing the crust.
Do your best to keep your bread from getting too dark and make sure that you’re cooking it for long enough.
Using Volume Instead Of Weight
Yes, you can make good bread using volume, but there is so much more room for error when you’re using measuring cups.
The ingredients you use when baking need to be near exactly the same as the recipe. Using cups in a recipe isn’t very consistent, especially when using flour. Some people compress the flour into their cups and some people spoon it in, so there is so much variation.
Using cups often leads people to make a dough that has far too much flour and therefore ends up dry and dense.
The best thing you can do for the most consistent results is to use the weights of every ingredient. It’s completely reliable since you’ll be adding the same amounts each and every time.
Why Is My Bread So Chewy?
One big thing that can make bread chewy is using a flour that has too much protein. Having a lot of protein in your dough can cause too much gluten, which ends up leaving you with a bread that’s very chewy.
Keep in mind that almost all original bread had a chewy texture. It’s just something that was a thing. Over time, we’ve found plenty of methods to soften bread, make them fluffier and lighter, and change their texture overall.
People have experimented with all kinds of different ingredients and it’s how we have all these different variations of bread now.
Here are some useful things you can do to make your bread less chewy next time.
Making Your Bread Less Chewy
Use A Different Flour
If your flour has a protein content that’s too high, you can either switch the flour out completely or do a combination of the same flour and something like all-purpose flour.
Doing this helps to reduce the total amount of protein and leads to a less chewy end result.
Implement Some Different Ingredients
There are plenty of recipes out there that add ingredients like eggs, milk, or some kind of fat to make the overall texture lighter and softer than the traditional kind of bread.
You can even try implementing tangzhong paste, a Japanese ingredient made by mixing flour and water and turning it into a sort of roux. This is an ingredient added to Japanese Hokkaido milk bread to make it so light and fluffy. It’s a personal favourite of mine, but you can add whatever you’d like to try.
Carry on Baking
All good bakers have been in the same situation as you. You put your loaf in the oven with high hopes and you end up being disappointed. Don’t get stressed or give up baking because of a few failed loaves. There’s not a single successful baker out there that’s not made mistakes.
Baking bread seems easy on paper, but there are so many techniques that go into making good bread. It takes time and effort, but you need to make mistakes to progress.
The best thing you can do is to see your failure as a good thing. Keep learning from every single mistake you make and eventually you’ll have enough experience to consistently make great bread.