
Baking a cake that doesn’t rise properly is one of the most common issues that inexperienced cake bakers have. It’s extremely disappointing when you put all your effort into prepping and making cake batter, only to be let down by the fact that it didn’t rise very much or at all in the oven.
Like anything, cake baking requires plenty of practice for you to gain an understanding of what makes it bake properly, so it’s mainly just a matter of figuring out where you went wrong and avoiding the same mistake with future attempts.
When you use out of date baking powder or when the butter and sugar aren’t creamed enough, the cake won’t rise well. You know baking powder is good when it fizzles when it’s put into hot water. The creamed butter and sugar should be light and very pale yellow.
Of course, these aren’t the two only mistakes you can make. There are plenty of other issues that might be causing your cake to not rise, and we’re going to be going through them.
Once you get an idea of where you’re going wrong, you’ll be able to be more successful next time. This means that you’ll be able to continously improve after each baking attempt until you’re pulling perfectly baked cakes out your oven every time.
Reasons Why Your Cake Won’t Rise
Here are the things that are most likely causing your cake to rise insufficiently. It’s important that you go through each point and think about how it might relate to your specific situation.
From here, you can make adjustments to how you’re baking your cake and you should have more success on your next attempt.
Your Oven Wasn’t Hot Enough
Everyone has an oven in their home, but a significant amount of household ovens aren’t all that great for baking.
Whether it’s uneven heat, heat loss, or just not being accurate, there’s almost always at least one issue with an oven that can make it slightly more difficult to bake your cake.
In this case, your oven might just not be running hot enough. When it’s not getting to a high enough temperature, the cake batter won’t get the initial burst of heat that it should. Baking powder goes through a second activation when it’s heated, which causes the cake to rise.
Without enough heat, the baking powder won’t activate until too late in the baking process, which leads to a flat and dense cake.
Fix: Make Sure You’re Getting The Temperature Right
Finding the right temperature to bake your cake is essential for making sure that everything works out. Too low of a heat and it may not rise or bake properly and too high of a heat and it will bake too quickly on the outside whilst remaining raw in the center.
Since ovens can be so inaccurate, it’s wise to get an oven thermometer so you can know what temperature your oven is actually getting to. You might be setting it to a certain temperature whilst it’s reaching a completely different temperature.
This oven thermometer gives you a better idea of how hot your oven is getting, so you’ll be able to adjust it accordingly if it isn’t accurate.
Your Leavener Is Out Of Date
Whether you’re using baking powder or baking soda, there’s always a chance that it’s gone bad and no longer works as a leavener.
Whilst these leaveners can last a long time, it will come to a point where they have lost their ability to leaven properly, which will lead to problems with your cakes rising.
This is generally only a problem with people who don’t bake often, so their powder has been sitting in their cupboards for years.
Make sure to test your leavener to make sure that it’s still good to use.
Fix: Test Your Leavener Or Replace It
The ways to test baking powder and baking soda are very easy and won’t require much extra effort at all.
For baking powder, you simply need to put some into some hot water. You should notice that it starts to fizz a good amount. If there’s little-to-no fizzing, it’s reached the end of its life and needs replacing.
For baking soda, you need to get some form of acidic liquid, like vinegar, and put some of the baking soda in it. Aggressive fizzing is a very good sign that the baking soda is still active. Little-to-no fizzing indicates that it’s not effective to use.
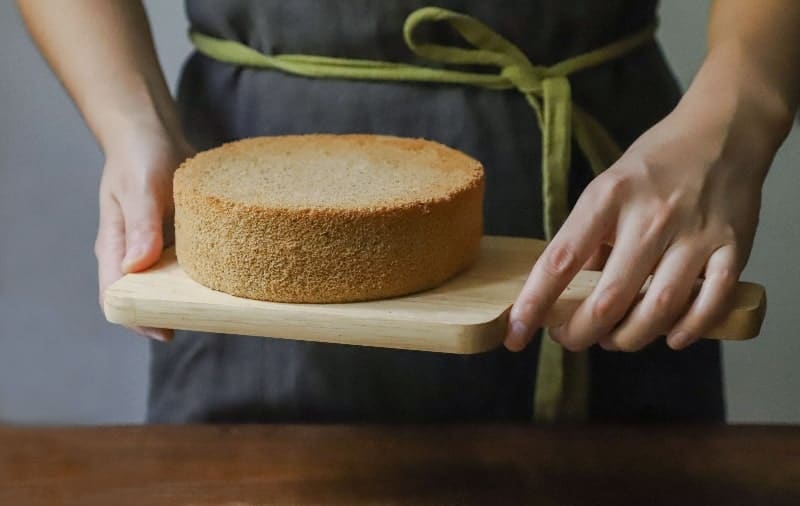
The Cake Tin Was Too Wide
Having a baking tin that’s too wide can make it look like your cake didn’t rise enough, even if the batter was perfectly fine.
The cake tin you use needs to be appropriately sized for the volume of batter you’re using.
A cake tin that’s too wide will mean that the batter is very thin. This will cause it to bake very quickly and it won’t seem to rise very much. Since it’s so thin, it doesn’t have the ability to become a tall and large cake.
Fix: Figure Out Which Tin Is Best
If you’re spreading your cake batter too thin, you’re going to need to thicken it up a bit more by using a smaller tin.
By using something with a smaller diameter or length, you’re going to be able to fill it higher using the same amount of batter, which means that you’ll be able to see that it rises more and you end up with a taller cake.
The Batter Was Overmixed
Getting the amount of mixing right is difficult for some people, so overmixing is very easily done if you don’t know what you’re doing.
When you mix the dough too much, you’re creating more gluten in the batter, which leads to a more dense and chewy texture in the cake. Think about how bread is kneaded rather than just being mixed together. This kneading is to create gluten, which is essential for bread, but something you want to avoid with cakes.
Cakes need to be light and soft, and you just can’t get that if you’re building too much gluten.
This gluten adds more resistance to the gases in the cake batter as it bakes. Instead of rising with ease like a normal cake, this resistance makes it more difficult for the cake to rise, so it won’t rise very much at all.
Fix: Be Gentle When Mixing
The idea when creating the batter is the add all the ingredients together until they’re just combined. Being too rough with the batter will lead to excessive mixing and unnecessary gluten development.
When you go ahead and combine the wet and dry ingredients, you only need to mix them until all the dry ingredients are hydrated. You’ll know it’s ready when there are no signs of dry ingredients anywhere in the bowl.
Another tip is to always sift your flour before incorporating it into the mixture. This gets rid of lumps and evens out the flour, which makes it much easier to incorporate into the wet ingredients.
The Oven Was Opened Too Soon
Everyone is eager to watch their cake rise in the oven. It’s completely fine to sit at your oven’s door and watch your cake bake if you want to, but please don’t open it to take a closer look.
The only time it’s acceptable to open the door is when the cake is close to fully baking.
Every time you open the oven door, you’re releasing hot air and letting in cold air. This can cause the cake to collapse and your dreams of a perfectly risen cake are ruined.
Fix: Don’t Be Impatience
I know this might be a bit of a stretch, especially when the smell of freshly baked cake starts to fill your kitchen, but you need to be strong and avoid opening the door to take a closer look.
If your oven has a glass window on the door, just look through that. If you can’t see through the glass because it’s so dirty, I think you know what you need to do. If your oven doesn’t have a glass window, you’ll have to trust the timing and only open it when it’s getting close to finishing baking.
You Didn’t Cream Or Beat The Ingredients Properly
Creaming refers to mixing the butter and sugar together until they’re very light and fluffy whilst beating, in this context, is when you add the eggs to the creamed butter and sugar.
When creaming, you need to get the mixture to a very pale yellow or almost white color and it should have increased in volume due to the air that’s been mixed into it.
Once this is done, you can start with the beating. You do this properly by adding the eggs in, bit by bit until they’re fully incorporated. Adding them all at once can cause everything to curdle, which isn’t fun to deal with, so make sure that you add all the eggs slowly.
Fix: Learn How To Mix The Ingredients Properly
Unless you’re an experienced baker, you won’t know what most of the cake-baking terminology means or what to look for, so you need to get a better understanding of this.
Watch videos, read books, and look for pictures of how things should look or feel and how to do things that you’re not sure on.
The only way you’re going to get better is to learn new the most efficient way of doing things.
Your Ingredients Weren’t At Room Temperature
Having all your ingredients at room temperature is vital in making good cake. If they’re all at different temperatures, it can easily throw off how well they mix and how the batter bakes.
For example, you’re never going to have a good time when it comes to creaming the butter and sugar if the butter is still cold from the refrigerator. It needs to be softened to be creamed properly.
If the cake batter is too cold when it goes in the oven, it’ll take a longer period of time to bake and the baking powder will take a longer time to activate, which can lead to a badly risen cake.
Fix: Get All Your Ingredients Together In Advance
My top tip for cake baking is to be prepared well in advance. Know what ingredients you’re using and how much of each you need so you can be ready when it comes to making everything.
By getting everything ready early, you’re removing any unnecessary stress and it’s much more efficient.
Take all your ingredients and put them together on your kitchen counter at least a few hours in advance so they can get to room temperature.
If you didn’t plan in advance, don’t worry too much as you can still warm up ingredients like butter and eggs easily.
To soften butter, all you need is a microwave. Simply keep it in its paper wrap and put it in the microwave for 5-second intervals, rotating 90 degrees after every 5 seconds for even heating. You’ll be able to get softened butter in less than a minute with this method. Just make sure it doesn’t get too hot and melt.
To warm up eggs, all you need is slightly warm water. You just need to gently place the eggs in the warm water for a few minutes until they’ve lost their chill.