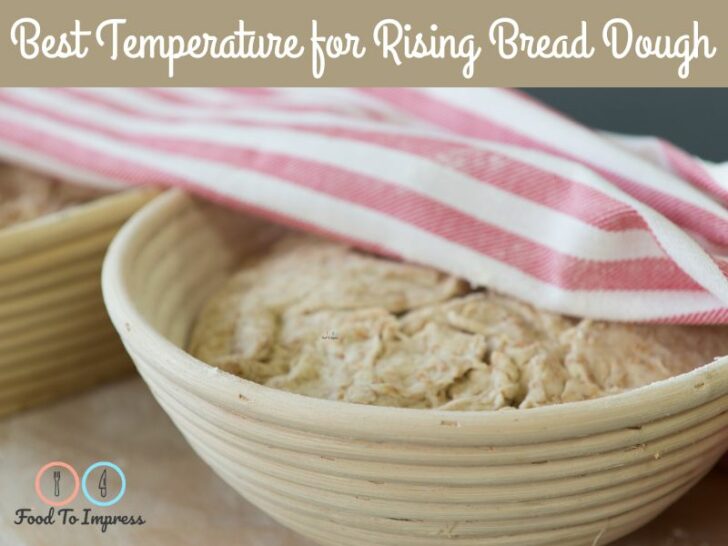

There is absolutely nothing more tantalizing than the smell of fresh-baked bread. Not only is it a journey back to the days when a person’s survival depended on fresh loaves of bread, but it is also a means of eating more healthfully in today’s world, a world lost in convenience versus embracing the old-fashioned way of life. Almost any type of bread imaginable can be baked to meet your needs, but it all begins with the dough. When you are making homemade bread, it is critical to have the best temperature for rising bread dough.
I experienced many flopped loaves of bread when I first started baking bread. With a drafty kitchen in my house, I have never had success having bread dough rise on the counter. I have had the best luck by turning on the oven to heat it up just a little bit and turn it off. Simply place your dough in the oven (turned off) cover it with a cloth napkin and let it rise according to your recipe.
Read below for more suggestions about the best temperature for rising bread dough.
Best Temperature for Rising Bread Dough – Cool Rise Method at Lower temperatures
Shape the dough, cover with plastic wrap, and refrigerate for two to 24 hours. Remove plastic wrap, place dough in a dough container like a greased bowl, and cover.
Let the bowl of dough slow rise in a warm place and a draft-free place. This allows the rising bread dough to be made the night before for the next day.
Tips & Warnings For The Best Temperature for Rising Bread Dough
Keep all ingredients near room temperature — about 75 degrees F — to allow for faster rising. Put cold milk in a microwave on high for one minute to warm. Warming the mixing bowl in a warm oven helps as well. Raise the dough in the oven by turning it on and letting the temperature of your dough warm up for two minutes, then turn it off and place the covered bowl inside. Turn on the inside light and look through the window to see when it rises.
Ovens with a pilot light are just warm enough without turning on the oven. Place 1 cup water in a glass measuring cup in the microwave and heat high for 2 minutes. Remove the water and put the covered bowl in the microwave to rise at optimal temperature without turning it on.
Higher temperatures should never be over 90 degrees F for the rising of bread. Excessive heat will kill the yeast so it won’t produce carbon dioxide.
Read more here to answer the question – if my bread dough didn’t rise can I still use it?

Conventional Method That Professional Bakers Use
Place the required amount of dry fresh yeast, as per the individual recipe, and 1 tsp sugar in a glass measuring cup. Add warm water with a temperature of 110 to 115 degrees Fahrenheit. The mixture will start to bubble and foam.
Place the rest of the sugar, shortening or butter, and the required amount of flour per individual recipe in a mixing bowl after the yeast has bubbled for a total of seven minutes. Mix then add flour to make a soft, slightly sticky dough.
Knead the dough on a board or cloth until it is very smooth and springs back into shape when pinched.
Grease a bowl with oil or butter. Form the dough into a ball; place it in the bowl then turn it over until the entire ball is oiled. Place a clean, tea towel over the bowl and set it in a warm area — about 80 to 85 degrees F. The fermentation time will start and the bread will rise in 1 to 1 1/2 hours.
History Of The Yeast Bread Dough
Early Egyptians are credited with having discovered the process of making actual dough. Around 1000 B.C. they realized that when they added yeast to a paste made from wheat, the bread would rise and be a softer loaf.
Before their accidental discovery, bread was hard and flat. This was also the era when beer bread was developed, along with the discovery that wheat could be refined to produce white bread. While the ancient Greeks picked up on this discovery, spreading it through Europe, it wasn’t until 1859 when Louis Pasteur discovered how yeast helped make bread dough rise. His discovery allowed for many different types of bread to be produced.
Significance of Rising Bread Dough
In the early days of civilization, bread became a more important staple than meat due to its ability to satiate the appetite. Early Romans gave the citizens the grain needed to make their bread. During the French Revolution, the citizens of France depended on bread for their very survival. In the Middle Ages, a person’s social status was based on the bread they ate.
If the bread was dark brown, it meant that the person was of a lower class because he couldn’t afford to purchase the more expensive white flour. In today’s society, homemade bread represents more healthful eating. Fresh-baked sourdough bread does not contain all the additives and preservatives of store-bought bread, and the taste and smell of homemade bread are more appetizing.
Six Steps of Bread Making
No matter what type of bread you are making, there are generally six steps involved in the process. First, you need to mix your ingredients. While the ingredients needed vary according to the type of bread being made, they are often flour, sugar, yeast, butter, milk, and/or hot water.
The amount of flour will determine the outcome of your bread. If too much flour is used, the dough will be heavier and crumble much more easily. You need only enough flour to ensure that the dough does not stick to the bowl or your hands when you begin kneading it.
The process of kneading develops the gluten in the flour. While the flour is responsible for the texture of the bread, the yeast activity is what causes it to expand, or rise. Yeast is a living organism, so it ferments. It is through the fermentation process that the starches break down, causing an expansion of the gluten in the flour.
Once the bread has been kneaded, it needs roughly an hour to rise. During this time, it should be kept in a warm environment and covered. The bread dough should double in size. This is the first rise.
Once it has risen, it needs to be punched down to release any carbon dioxide gas pockets in it. It can then be shaped into a loaf pan or made into dinner rolls or crescent rolls, or anything you would like it to be. It then needs to second rise, till it’s almost doubled. It will then be ready for baking.
Types Of The Best Bread
Many types of bread and bread recipes can be produced from the dough, depending on the various ingredients added. There is rye bread, made with a combination of wheat germ and rye grain. White bread is produced from flour that has been processed to leave only the endosperm (core) of the grain.
Whole-grain bread is made from a dough that has whole-wheat flour and bran added to it. With self-rising flour or baking powder, products such as muffins, pancakes, and quick bread such as zucchini and banana bread can be created. Bread dough can also be used to make homemade pizza, calzones, and every kid’s favorite, pigs in a blanket.
Considerations for the Best Temperature for Rising Bread Dough
One thing to keep in mind when making a loaf of bread is freshness. Store-bought bread remains fresher longer due to the additives and preservatives, which give it a longer shelf life. To keep homemade bread fresh, it needs to be wrapped and kept in a cooler temperature.
This will help slow the production of mold. If it is stored in a warmer environment, it will begin to grow mold after a couple of days. Fresh-baked bread tastes its best soon after it comes out of the oven (although you should wait till it’s completely cool before cutting it).
Bread must rise to make a fluffy, light loaf otherwise; it will be flat and tough. Yeast is the substance that allows the dough to rise. Yeast is a living organism made of a fungus that eats simple sugars in the dough and expels carbon dioxide as it ferments. This creates a gas that makes the dough rise. It is possible to make bread rise in several different ways, including the conventional and cool rise methods.