
If you’re a fan of sourdough bread recipes, you won’t want to miss this cranberry walnut sourdough bread recipe. This bread offers a tangy and aromatic flavor that’s perfect for any occasion. Whether you’re a seasoned baker or just starting, our step-by-step instructions will guide you in making this delicious bread.
To start, you’ll need dried cranberries, earthy walnuts, various flours, warm water, orange zest, and maple syrup. The combination of these ingredients creates a unique blend of flavors that you won’t find in any other bread.
Before you start baking, you’ll need to prepare an active sourdough starter. This involves fermenting a mixture of flour and water in a warm place for a certain period of time. Next, mix your dough and allow it to undergo bulk fermentation and rise.
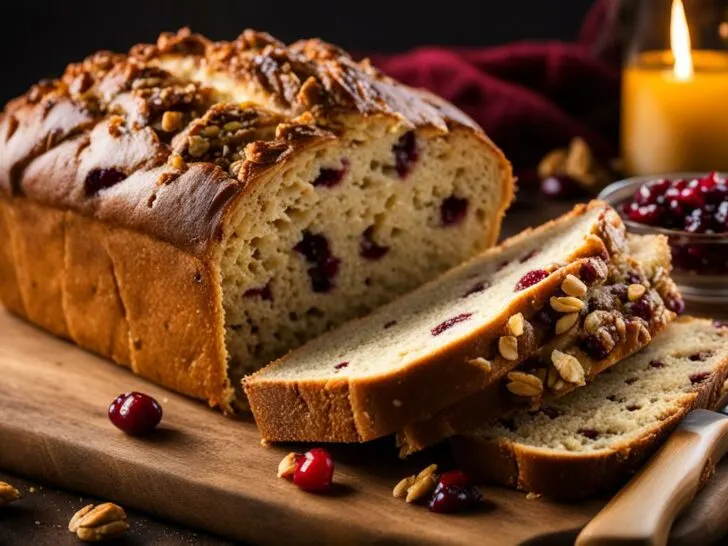
Shaping and giving the dough its final rise are crucial for achieving a beautifully textured loaf. And once it’s baked, allow the bread to cool on a rack before cutting it into thick slices and serving it warm.
If you’re feeling adventurous, be sure to check out our variations and tips section for insights on how to add fresh cranberries or orange zest to your sourdough cranberry walnut bread.
Cranberry walnut sourdough bread is a perfect addition to any meal or enjoyed as a snack. Impress your family and friends with your baking skills and try out this incredible recipe today.
If you like to add different flavors to your sourdough bread, try this Rosemary Sourdough Bread recipe or Sourdough Bread Pizza.
Ingredients for Cranberry Walnut Sourdough Bread
To make a delicious cranberry walnut sourdough bread, you’ll need:
- Dried cranberries: These plump berries add a sweet and tangy flavor to the bread. You’ll need 1 cup of dried cranberries.
- Whole wheat flour: This healthier alternative to white flour is full of nutrients and fiber. You’ll need 1 cup of whole wheat flour.
- Warm water: The warm water is used to dissolve the active sourdough starter and activate the yeast. You’ll need 1 cup of warm water.
- Bread flour: This high-protein flour is essential for creating a strong gluten structure in the bread. You’ll need 3 cups of bread flour.
- Orange zest: The zest of an orange adds a fresh and citrusy aroma to the bread. You’ll need the zest of one orange.
- Whole grain flour: This wholesome flour adds a nutty flavor and texture to the bread. You’ll need 1/2 cup of whole grain flour.
- Rice flour: Rice flour is added to the banneton basket to prevent the dough from sticking. You’ll need 1/4 cup of rice flour.
- Poppy seeds: These tiny seeds add a slight crunch and nutty flavor to the bread. You’ll need 2 tablespoons of poppy seeds.
- Active sourdough starter: This is the natural yeast that ferments the dough and gives it its tangy flavor. You’ll need 1/2 cup of active sourdough starter.
- Fresh orange juice: The fresh orange juice adds a bright citrusy flavor to the bread. You’ll need 1/4 cup of fresh orange juice.
- Maple syrup: This natural sweetener adds a subtle sweetness to the bread. You’ll need 2 tablespoons of maple syrup.
- Brown sugar: This sweetener adds a deeper flavor and color to the bread. You’ll need 2 tablespoons of brown sugar.
- Fresh cranberries: These tart berries add a burst of flavor and texture to the bread. You’ll need 1 cup of fresh cranberries.
- Earthy walnuts: These nuts add a rich and nutty flavor to the bread, as well as a satisfying crunch. You’ll need 1 cup of earthy walnuts.

Making the Sourdough Starter
Before starting the process of making cranberry walnut sourdough bread, you need an active sourdough starter. An active starter is a mixture of flour and water that has been fermented for a certain period. This process activates natural yeasts, which in turn create a bubbly and active starter, which will help to make the bread rise and develop a tangy flavor.
Here’s how to make an active sourdough starter:
- Mix equal parts of whole wheat flour and warm water in a clean, glass jar. For example, if you use 50 grams of flour, add 50 grams of warm water. Make sure the mixture is smooth and free of lumps.
- Cover the jar with a clean towel or plastic wrap and let it sit in a warm place for at least 24 hours. The fermentation time may vary depending on the temperature and humidity of your home.
- After 24 hours, stir the mixture and discard half of it. Add equal parts of new flour and water to the jar, stir well, and cover again. Let it sit for another day in a warm place.
- Repeat the process of discarding half and feeding the starter with equal parts of new flour and water for at least five days. By this time, you should have an active starter that smells tangy and bubbly.
Remember to use only filtered or bottled water to make the starter. Avoid using tap water, which may contain chlorine or other chemicals that can inhibit the growth of natural yeasts.
Keep the active starter in the fridge and feed it at least once a week to maintain its vitality. To use it in the bread recipe, take it out of the fridge one day before baking and let it sit at room temperature to reactivate.
Tip: If you don’t have an active sourdough starter, you can make one from scratch by following the same process, but it may take up to two weeks to become active. You can also purchase a starter from a local bakery or online.
Mixing and Fermenting the Dough
With the sourdough starter ready, it’s time to mix the dough. In a large mixing bowl, combine the active starter with the bread flour, whole wheat flour, whole grain flour, rice flour, brown sugar, maple syrup, warm water, orange zest, dried cranberries, and roughly chopped walnuts.
Using a bench scraper, mix all the ingredients until the dough is moist and sticky. Cover the bowl with plastic wrap and let it rest for at least 30 minutes. This allows the flour to absorb the water and creates a smooth and stretchy dough.
After the dough rest, it’s time for bulk fermentation. Remove the plastic wrap and use the bench scraper to perform sets of stretch and folds. This helps with gluten development and gives the dough structure. Cover the bowl with plastic wrap and let it rise for 4-5 hours at room temperature.
During bulk fermentation, the dough will rise significantly and become more elastic. After the bulk rise, gently deflate the dough with the bench scraper and shape it into a rectangle with lightly floured hands.
Bulk Rise
- Prepare the sourdough starter and mix the dough ingredients.
- Let the dough rest for 30 minutes.
- Perform sets of stretch and folds.
- Cover the bowl with plastic wrap and let the dough rise for 4-5 hours at room temperature.
After shaping the dough into a rectangle, fold it into thirds, and place it in a well-floured banneton basket. Cover the basket with a towel and let the dough undergo bulk rise for another 2-3 hours at room temperature.
Dough Rest
- Shape the dough into a rectangle and fold it into thirds.
- Place the dough in a well-floured banneton basket.
- Cover with a towel and let the dough rest for 2-3 hours at room temperature.
The final bulk rise gives the dough its airy and light texture, and allows it to fully ferment and develop its flavor.
Shaping and Final Rise
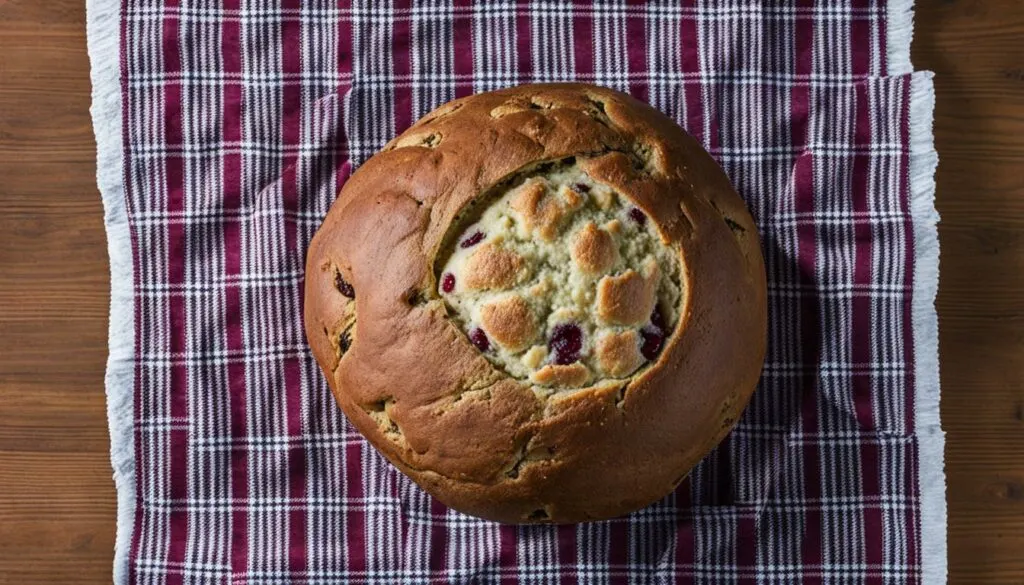
After the dough has undergone bulk fermentation, it’s time to shape it into a beautiful loaf. This is where the banneton basket comes in handy. A banneton basket is a round or oval-shaped basket traditionally used by French bakers to shape bread dough. It ensures that the dough rises evenly and maintains its shape during the final rise.
To shape the dough, turn it out onto a floured surface. Fold the dough over onto itself several times to create tension, then shape it into a smooth round ball or a rectangle shape. Place the dough into the banneton basket, smooth side down, and let it proof for the final rise.
Proofing is the final rise that allows the dough to rest, and the yeast to produce carbon dioxide that will expand the bread. The proofing time varies depending on factors such as temperature, humidity, and the type of dough. Typically, sourdough requires a longer proofing time than commercial yeast bread. A wet dough will take longer to proof than a dry dough due to its higher hydration level.
Be sure to cover the dough with plastic wrap or a damp cloth to prevent it from drying out during the final rise. Once the dough has doubled in size, it’s time to bake!
Using a banneton basket not only creates a beautiful loaf shape but also adds a professional touch to your bread-making. The basket’s design leaves a decorative floury spiral pattern on the bread’s surface, creating a rustic and artisanal look.
Baking the Cranberry Walnut Sourdough Bread
Now that your dough has undergone the final rise, it’s time to bake it to perfection. You have two options for baking: using a Dutch oven or a loaf pan. Both methods have their advantages, but the former is more commonly used for sourdough bread.
Baking in a Dutch Oven
If you choose to bake in a Dutch oven, preheat your oven to 450°F (232°C) with the Dutch oven inside. Once the oven is preheated, carefully remove the pot and line it with a sheet of aluminum foil. Transfer the dough to the pot, making sure the smooth side is facing up. Add a few dashes of flour or seeds on top of the dough to add some texture and cover the pot with its lid.
Place the pot back into the oven and bake for 20 minutes. After this time has elapsed, remove the lid and continue baking for an additional 20-25 minutes or until the top of the bread is golden brown. Once the bread is done, carefully remove it from the pot and place it on a wire rack to cool.
Baking in a Loaf Pan
If you opt for a loaf pan, preheat your oven to 350°F (175°C). Grease your loaf pan and transfer the dough into it. Make sure to flatten the dough to fill the pan evenly. Add a few dashes of flour or seeds on top of the dough and cover the pan with a sheet of aluminum foil.
Bake the bread for 50-60 minutes or until a toothpick inserted into the center of the bread comes out clean. Once the bread is done, remove it from the oven and allow it to cool in the pan for 10 minutes. Then remove the bread from the pan and place it on a wire rack to cool completely.
Whether you choose to use a Dutch oven or a loaf pan, the ideal oven temperature and bake time may vary depending on your oven’s calibration and altitude. Therefore, it’s best to keep an eye on your bread and adjust accordingly.
For best results, always bake your bread until the internal temperature reaches 200°F (93°C). This ensures that the bread is fully cooked and not doughy in the center.
Once the bread is done, allow it to cool on a wire rack for at least an hour before slicing it.


Cooling and Serving
Once you have completed the baking process for your cranberry walnut sourdough bread, it’s important to let it cool down properly before slicing and serving. Cooling bread on a rack allows air to circulate around the loaf, preventing moisture from accumulating and creating a soggy texture.
Choose a cooling rack that is large enough to accommodate your loaf without the edges hanging over. Place the bread on the rack and let it cool for at least 30 minutes before slicing.
When it’s time to cut into the bread, use a sharp serrated knife to create thick slices. This will help preserve the structure of the bread and prevent it from becoming too dense. A thick slice also allows the full flavors of the cranberries and walnuts to shine.
For an extra cozy experience, try serving your cranberry walnut sourdough bread warm. Simply place the slice in a toaster oven or microwave for a few seconds to heat it up. The warmth will bring out the natural sweetness of the cranberries and make the bread even more indulgent.
Variations and Tips
While the basic recipe for cranberry walnut sourdough bread is delicious on its own, there are a few variations you can try to switch things up.
Sourdough Cranberry Bread
If you don’t have any walnuts on hand, or simply prefer your bread without nuts, you can make a sourdough cranberry bread instead. Simply omit the walnuts and increase the amount of dried or fresh cranberries in the dough.
Sourdough Cranberry Walnut Bread with Orange Zest
If you want to add a citrusy twist to your bread, try adding some fresh orange zest to the dough. The zest pairs well with the tartness of the cranberries and the earthiness of the walnuts.
Using Fresh Cranberries
While dried cranberries work well in this recipe, you can also use fresh cranberries if they’re in season. Simply chop them up into small pieces and add them to the dough.
Room Temperature
Make sure your dough is at room temperature before you start shaping it. This will make it easier to work with and ensure that it rises properly.
Stretching the Dough
During the bulk fermentation stage, make sure to stretch the dough several times to help develop the gluten. Do this in sets of stretch and folds, and let the dough rest for a few minutes in between each set.
Rectangle Shape
For a more unique shape, try shaping your dough into a rectangle instead of a traditional round loaf. This will give you a wider surface area for creating a crispy crust.
Cutting into Smaller Pieces
If you’re serving your bread at a party or gathering, try cutting it into smaller pieces. This will make it easier for people to grab and eat, and will also give everyone a chance to try a bite of the delicious cranberry walnut sourdough bread.
FAQ
Can I substitute fresh cranberries with dried cranberries in this recipe?
Yes, you can substitute fresh cranberries with dried cranberries in the cranberry walnut sourdough bread recipe. However, keep in mind that dried cranberries might be sweeter and have a slightly different texture compared to fresh ones.
Can I use a regular loaf pan instead of a Dutch oven?
Yes, you can use a regular loaf pan instead of a Dutch oven to bake the cranberry walnut sourdough bread. Simply shape the dough and place it in a greased loaf pan before baking.
How long does the sourdough starter need to ferment?
The sourdough starter needs to ferment for at least 8 hours or overnight. This allows enough time for the natural yeasts to activate and create a bubbly and active starter.
Can I add other nuts instead of walnuts?
Yes, you can substitute walnuts with other nuts of your choice, such as pecans or almonds. The choice of nuts will add a different flavor and texture to the cranberry walnut sourdough bread.
How long should I let the dough rest during bulk fermentation?
You should let the dough rest for about 30 minutes during bulk fermentation. This resting period allows the gluten to relax and makes the dough easier to shape later on.
Can I freeze the baked cranberry walnut sourdough bread?
Yes, you can freeze the baked cranberry walnut sourdough bread. Wrap it tightly in plastic wrap and then place it in a freezer bag or airtight container before freezing. Thaw the bread at room temperature when ready to use.
Can I use a different type of flour instead of whole wheat flour?
Yes, you can use a different type of flour instead of whole wheat flour. Experiment with different flours like rye flour, spelt flour, or even all-purpose flour to achieve different flavors and textures in the bread.
How do I know when the bread is fully baked?
The cranberry walnut sourdough bread is fully baked when it sounds hollow when tapped on the bottom and has a golden brown crust. Additionally, you can use a digital thermometer to check if the internal temperature of the bread reaches around 190-200°F (88-93°C).
Can I add other flavors like cinnamon or nutmeg to the bread?
Yes, you can add other flavors like cinnamon or nutmeg to the cranberry walnut sourdough bread. Add a teaspoon or two of your desired spice during the mixing stage for an extra burst of flavor.