

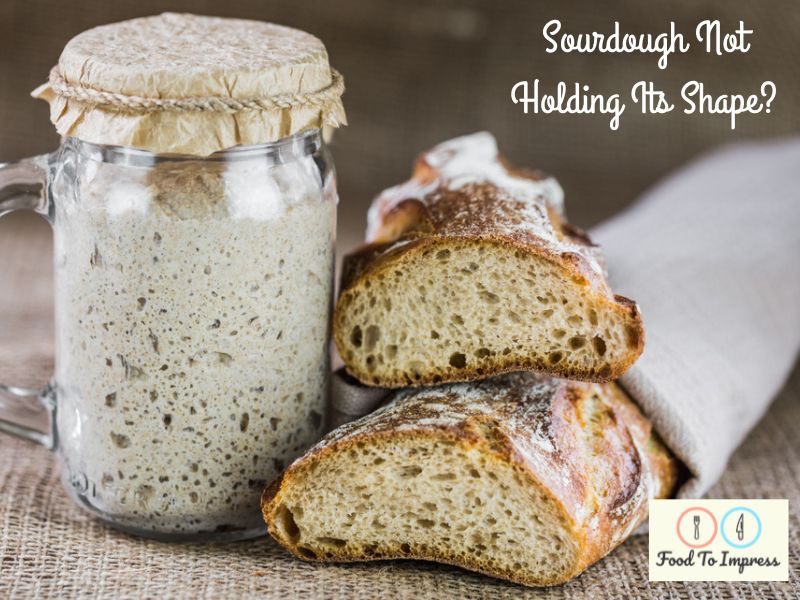
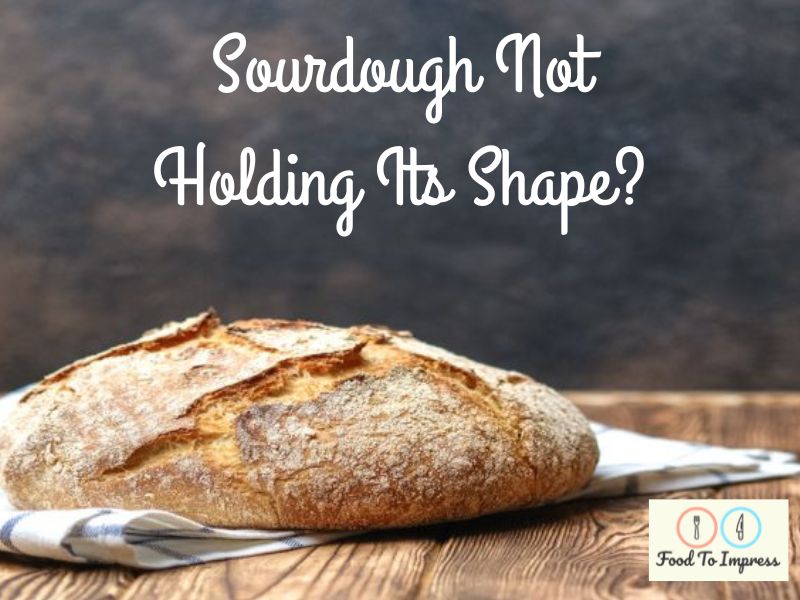
Is your sourdough not holding its shape? Putting in the time and effort to make sourdough can leave you expecting an excellent loaf of bread by the end, but it’s not always the case. It’s really exciting after your sourdough has finished its final proof and it’s almost ready to bake, but that excitement can soon be ruined.
Once turning the dough out from the basket it might fall flat. This is a huge disappointment and often leaves bakers confused and frustrated with their bread.
More often than not this can still be baked, but it doesn’t get the beautiful rise or the crumb you might have come to expect after seeing pictures and videos of perfect sourdough.
Sourdough doesn’t hold its shape due to many reasons. It could be lacking surface tension, too high hydration, or just missing a good gluten structure. Pinpointing exactly what’s causing the issue of sourdough not holding its shape can be difficult, but it’s important for improving future loaves.

Sourdough Not Holding Shape – You Need To Figure Out Why
Without first identifying what’s causing your problem, you’ll likely struggle to fix it.
By knowing what you’re doing wrong, you’re able to rethink your techniques, ingredients, and timings and figure out how to help it.
On a side note, if your sourdough isn’t rising at all during baking, there might be other problems at play. Take a few minutes to read through this article I’ve written about why your sourdough didn’t rise and how to fix it. You should be able to get a good idea of what went wrong once you’ve looked through it.
Here are the 6 main causes for your sourdough falling flat after proofing.
1. You’re Not Using A Suitable Flour
Flour plays a key role in good bread, so without good flour, you’re not going to get the bread you want.
There are two main things to think about when using flour to bake bread:
- How Much Water It’s Going To Absorb
- How Much Gluten It’s Going To Be Able To Develop
Not all flour is created equally. In fact, all flour is going to be slightly different, even if it has the same name.
Certain flour is going to absorb more water than others and can, therefore, affect how wet the dough is. For example, wholewheat flour absorbs more water than all-purpose, so it’s going to leave you with a dough that feels drier and less sticky.
This is why changing a recipe’s flours can have such a significant effect on how the end product turns out.
For a good structure in your sourdough, you’re going to need a flour with high protein content. Higher protein flours can develop more gluten than standard flour, so they do the best job at making good bread.
The go-to flour for making the most simple sourdough bread at home is strong white bread flour. This contains enough protein to allow for plenty of gluten development and a nice rise in your loaf.
2. The Gluten Wasn’t Developed Enough
If your dough tears easily, falls flat, or doesn’t rise well, it may indicate that you haven’t fully developed the gluten.
Sourdough that holds its shape after proofing has a well-developed gluten network rather than the sourdough is too runny to shape. This is exactly what you need in order to make a beautifully risen sourdough loaf.
When there’s enough gluten development, there is a much better structure to the dough and it can support itself rather than spread out.
3. You Didn’t Proof It In A Banneton
Without a banneton (or something like it) your sourdough isn’t going to turn out as well as it could. Allowing it to proof without the proper support of a basket is going to leave you with a sad and flat mass of dough.
You need a basket for two reasons:
- To support the rise of your sourdough
- To help the dough maintain its shape after proofing
There are plenty of alternatives for proofing baskets that you can DIY and many of them do a decent job, but the best thing you can use is a proper banneton basket.
Using a banneton and putting your dough in the fridge for a long and cold rise will help it rise efficiently and keep its shape after you tip it out.
If you don’t have a banneton, there’s no need to worry about it. There are plenty of alternative kitchen items you can use instead. Check out this article I’ve written for 7 great alternatives if you don’t have a real banneton.
4. Sourdough Not Holding It Shape? Maybe It Was Overproofed
Once sourdough has fermented for too long, its structure will start to degrade. The gluten breaks down and the dough becomes a sloppy and sticky mess.
If you try and put this onto your kitchen counter or in your oven, it will just spread out and get no rise whatsoever.
At this point, there’s no way to help the sourdough at all. The best thing you can do is to pour the mess into a loaf tin and bake it as normal. It won’t be as good as normal bread but at least you’re not wasting it.
5. It Wasn’t Shaped Correctly
One of the most important things for getting your dough to hold its shape rather than spreading out is to create surface tension.
Before putting your sourdough in the banneton to proof, you need to shape it correctly so it’s going to come out how you want it. You shouldn’t just shape however you want or it will spread once you turn it out.
You need to shape it in a way that stretches the surface of the dough like in the below video.
By building this surface tension, you’re creating a taut skin on the dough so it can’t easily relax and spread out very much.
You should make sure that you’re doing this with all your bread for the best results.
If you find that the dough is too sticky to shape, you might be doing something wrong. Yes, sourdough is generally quite sticky, but it’s not all that difficult to handle once you know what you’re doing. Take a quick look at my article about why your sourdough is sticky and what you should do about it here. You’ll get a better understanding of handling the dough after reading it.
6. There Was Too Much Water In The Dough
A dough with a hydration content that’s too high is going to spread. It’s as simple as that.
Going up to 75% water content or higher can make people struggle to keep the shape of their sourdough loaf. For a beginner, it’s best to keep the hydration level somewhere between 60-75%. Using lower hydration might not give you the exact result you want, but it’s all about practice.
High hydration doughs are for very experienced bakers, so it’s best to start off with low hydration and work your way up over time.
Always make sure that you’re using the right flour and measuring all ingredients by weight when making bread. This will ensure that you’re getting a result that’s close to that of the recipe.
How To Help Your Sourdough Keep Its Shape
Now that we’ve discussed what may be causing your sourdough to fall flat after proofing, we need to go through what you can do to help it keep its shape.
It can be difficult and take some trial and error to get your sourdough to hold its shape after being removed from the proofing basket but follow these tips and you’ll be able to get there eventually.
Use A Banneton
Is sourdough not holding its shape still? If you’re not already using a banneton to proof your dough, you need to go out and get at least one before you bake your next loaf.
Yes, you can improvise and make your own with a kitchen towel and a container, but it’s always best to use a basket that’s actually made for the job.
By using a banneton, you’re going to improve how well your dough stays in shape, how it proofs, and it won’t stick to the dough as long as you flour it well.
Build Surface Tension
Having a taut skin on your dough is important when making nearly any kind of bread, especially when it’s higher hydration.
By building surface tension, you’re preventing your sourdough from spreading out. When doing this, you’re creating a tight layer of gluten on the surface of the dough that acts cloak and keeps everything inside.
To get an even tighter surface, you can try the double shaping method. You can do this very simply by shaping it as normal, allowing it to rest for 15 minutes and shaping it again. After the 15 minutes rest period, you’ll notice that the dough spreads out slightly, so the second shape is ideal for preventing further spread.
Proof It Right
Is sourdough not holding its shape still? In order to make good bread in general, you need to know when it’s done proofing.
It can be a little tricky to identify when sourdough has proofed since it takes so long, but it’s just down to practice to get it right.
It’s easy to both underproof and overproof your dough, but once you get it right you’ll notice a good improvement in your bread.
Underproofing isn’t as much as a problem as over proofing though. Allow your dough to ferment for too long and you won’t have dough anymore. At least you’ll still have something you can bake into bread if you’ve underproofed it.
Proof It In The Fridge And Bake Straight Away
By proofing your dough in the fridge, you’re slowing the rise, but you’re also tightening up the gluten.
If you’ve ever tried to handle any kind of dough straight from the fridge you’ll know how much stiffer it gets
This stiff gluten is ideal for helping the dough hold its shape. Simply turn the sourdough out straight from the basket, score it and bake it.
If all goes well, you should notice that the dough doesn’t fall flat (or at least falls less) and you end up with a taller loaf.
This won’t affect your baking time very much but it will mean that it takes longer to make the bread in general due to the extra-long proofing time.
Develop Enough Gluten
Without gluten, you’re not going to get any rise or structure at all. So you’re not going to make good bread if you don’t develop your gluten properly.
To develop enough gluten, you need to pick a type of flour with a high protein content (something around 12-13%). You can build it either through mechanical action (kneading) or through chemical action (time).
Sourdough recipes often call for gluten to be built with time and minimal mechanical action. It can be through autolysis, stretch and folds, and long proofing times.
I personally built gluten in my sourdough through an autolyse, kneading, and lamination, but I also let it proof for long periods of time so it can get maximum gluten development.
The way you work with your sourdough to develop the gluten is completely up to you. Just make sure that you find something that gives you consistent results.
Reconsider The Hydration Level
Very high hydration doughs don’t hold their shape well and will, therefore, fall flat if you try and turn them out of a basket.
At a certain point, dough can become too wet to handle and requires a lot of effort to help it maintain a very simple shape. Think about ciabatta bread and how easily that can spread without the assistance of a proofing cloth.
If your dough feels so wet that it’s becoming difficult to handle and doesn’t maintain its shape, you might want to try lowering the amount of water in the recipe. By doing this, you’re going to have a better time working with the dough and it should hold its shape after you turn it out of the banneton.
Use Some Whole Wheat Or Rye Flour
If you’re currently just using a standard white flour for all of your sourdough loaves, you’re really missing out.
Flour like whole wheat or rye absorbs more water than standard flour, so you can reach higher hydration without it feeling as bad. Since it can take in more water, the dough isn’t as wet or difficult to handle.
Using an amount as small as 20% whole wheat or rye will have a noticeable effect on the feel of your dough and how wet it is overall.
Experiment with different percentages of these flours and find what works best for you. You might want to try 10%, 20%, or even 40%. Either way, it will affect your sourdough.
These flours aren’t just great for water absorption though, they’re also great for added flavor. Sourdough that’s made with 100% white flour has flavor from the sourdough, but adding different flours takes the flavor of the loaf to a completely new level, so it’s worth adding just for the added complexity.
If you want to prevent landing up with sourdough not holding its shape, be sure to follow the steps above to fix every type of sourdough bread.
Frequently Asked Questions
Why is my sourdough not holding shape?
Starter Activity: If the starter isn’t active enough, the dough may lack the necessary gases that contribute to its structure. Ensure your starter is bubbly and has doubled in size after feeding.
Hydration Levels: High hydration doughs (those with a lot of water) are harder to shape and can be more slack. Ensure you’re using an appropriate water to flour ratio for the desired structure.
Gluten Development: Under-kneaded dough may not have enough gluten development to hold its shape. Gluten provides the dough with strength and elasticity, which is essential for maintaining shape.
Handling: Rough handling of the dough can cause it to lose gas and structure. Handle with care especially during the shaping process.
Why is my sourdough not holding shape after bulk fermentation?
Overproofing: If dough is left to ferment for too long, it can weaken and lose its ability to hold shape. Check the dough during bulk fermentation to ensure it has grown in size but hasn’t gone past its peak.
Temperature: The temperature at which the dough ferments can affect its structure. Too warm and it may ferment too quickly, leading to overproofing. Too cold, and it might not ferment adequately.
Why does my sourdough flatten out?
High Hydration: As mentioned, high hydration doughs can be more slack and harder to shape. If you’re aiming for a tall loaf, consider reducing the water content.
Weak Starter: A weak or inactive starter might not produce enough gases to inflate the dough.
Overproofing: Overproofed dough can lose its elasticity and ability to hold gases, leading to a flatter loaf.
Shaping Technique: If the dough isn’t shaped tightly enough, it can spread out more during baking. Proper tension during shaping can help maintain a more rounded loaf.
What does overproofed sourdough look like?
Texture and Appearance: The dough will appear very bubbly, but those bubbles might be large and uneven. The surface might look slightly wrinkled or slack.
Poke Test: If you poke the dough and the indentation remains without springing back, it’s likely overproofed. A perfectly proofed dough should slowly spring back halfway when poked.
Flavor: Overproofed dough can have an overly sour or off taste due to excessive fermentation.
Baking Results: When baked, overproofed loaves often have a dense texture with fewer air pockets. They can also spread out more instead of rising upwards.
Ensuring that sourdough bread maintains its shape and texture is a delicate balance that hinges on several factors. From the vitality of the starter to the intricacies of hydration levels and fermentation times, every stage of the process plays a crucial role. An active starter, the right water-to-flour ratio, proper gluten development, and careful handling can make the difference between a lofty, structured loaf and a flat one. Recognizing the signs of overproofing, such as a slack appearance or an overly sour taste, is essential to achieving the desired results. As with many artisanal crafts, mastering sourdough demands both knowledge and experience. But with patience and practice, one can hone their skills to consistently produce beautiful, flavorful loaves.